Showing posts with label Guest Post. Show all posts

Monday, November 19, 2012

Remicade part 3: Thanksgiving, treasures & joy

In the past week, I've teared up multiple times when thinking about all I'm thankful for this Thanksgiving. I could barely get through sharing with some folks at church that I was thankful for my health (sob), and the perfectly formed baby in my womb (tears, sob, choke). I have SO MUCH to be grateful for this year. I mean, honestly, only Jesus--only my savior--could take me from an unconscious, horribly sick wreck to joy-filled, pregnant, and healthy in eight months. 

Today I was driving home from a remicade infusion and I heard a story on the radio about an anonymous donor who left a piece of art at a Federal Way Goodwill. The staff thought it trash,"across the board they thought it was ugly." (from cnn.com) They wondered why anyone would want it.

But one employee, someone familiar with art, recognized the artist's name, Salvador Dali, and was curious about the attached letter of authenticity. She did some research, and looked more deeply into this piece of art that others were quick to discard. And it seemed, actually, to be of value. Great value. An authentic, signed, Salvador Dali etching. Crazy.

It reminded me of a few stories in the Bible. Jesus himself likens the kingdom of God (following Jesus, living out his ways here on earth) to a treasure hidden in a field. The world sees only an empty field; yet one man saw potential, dug deep, and found a treasure of incomparable value. He sold everything he had in order to purchase the field, knowing the great value beneath the surface. (Luke 13).

God sent his son, the Messiah, to the world. It wasn't what anyone expected. He wasn't a handsome, strong, powerful man born into a kingly position. Isaiah 53:2 prophesied that Jesus "had no form or majesty that we should look at him, and no beauty that we should desire him." The Bible tells us he was born to a poor, unwed virgin. In a stable. He worked as a carpenter under his father. He wasn't anything special according the world's values. And yet, and yet...

I know that some of you who read this blog read skim my illuminations, my wordy posts about faith and Jesus and his love. It's easy to disregard something that seems to be total junk. But it is my hope, my prayer that like the employee at Goodwill who looked into things a little more, like the man in the story from Luke 13 who digs deep into a field, in search of treasure, that you might do a little of your own research. 

I believe that our God, Jesus himself, desires to reveal truth and make himself known. I trust that if you dig deep, if you do the research, if you look at the life of this simple yet perfect man, you'll find something incredibly valuable. Of greatest value. (If you have any questions about where to start, I'm happy to give you some starting places).

This Thanksgiving, I'm thankful for my savior. He's not just saved my soul, but he saved my life this year. He's given our family new life in the baby that dances in my womb. He's restored my health (than the Lord for modern medicine!) He's restored my hope in his people and his church, not because we are perfect, but because he perfectly loves us, wants to be known, and wants us to dig deep into who he is. He is a treasure that will not disappoint.

Monday, July 16, 2012

Guest Posting today...

This morning my family is heading on family vacation to Oregon. Head over to Wendy's blog Tales from the Motherhood to read my guest post on parenting with chronic illness.

If you like to read stories about unicorns, magic sprinkles, or well-behaved children, don't click the link. If, however, you like the occasional story about bad gas, indigestion, and/or the love of Jesus, well then, this is your lucky day.


Sunday, July 08, 2012

Black Forest Cupcakes: Guest Post from Against All Grain

Today you have the pleasure of hearing from my friend & neighbor, the incredibly talented Danielle from Against All Grain. I have the joy of getting to taste test several treats as Danielle is in various stages of recipe development. It's a tough job, but somebody's gotta do it. In search of the perfect grain-free birthday dessert, I have to say, her black forest cupcakes are pretty hard to top.


Danielle Walker is the author and creator of 
the grain-free recipe blog, Against All Grain (againstallgrain.com). She is first and foremost a devoted wife and loving mom to her wonderful husband and rambunctious toddler, but finds joy in her spare time developing tasty recipes for those on restricted diets.  Using grain-free flours such as coconut and almond flour, she creates familiar comfort foods that leave people 
with food allergies feeling satisfied rather than deprived.  Her passion is to share with everyone that eating a diet of real, healthy foods does not mean living in a world of bland and uneventfulfood. All of the recipes on Against All Grain are grain-free, gluten-free, refined sugar-free, and low to minimal dairy.
*********

black forest cupcakes with whipped cream frosting

Untitled
You may remember the great cupcake vs muffin debate we had on Facebook a few weeks ago. I asked you which recipe you’d like to see first and it was a pretty even split, but muffins won by just a hair. I posted the recipe for my Cherry Chocolate Muffins first, and now it’s your moment cupcake lovers!
You’re probably asking yourself what the difference is between a muffin and cupcake. They are both cake like baked goods that come in a small single serving wrapper right? I’d say the biggest distinction between the two is frosting or no frosting. Muffins are also generally a little more dense than a cupcake and typically less sweet (although there are SO many exceptions to that rule!).
While I was developing this recipe, I came out with a few batches that were meant to be muffins but were just too sweet and a little too fluffy to feel like a fulfilling breakfast bread. So instead of forcing them into one category or another, I just made recipes for both!
The cupcakes use coconut oil while the muffins use cacao butter, and the cupcakes have a cherry compote filling and then are topped with a sweet whipped cream. These do fall in the center a little more than the muffins, so don’t be alarmed if they sink a bit after you’ve removed them from the oven. You’ll be filling the center and covering it up with frosting anyways!
Two little treats that seem alike, but have such different flavor profiles!
And lastly, here’s a funny little difference I read: “If you threw a cupcake against the wall, you would hear something of a ‘poof!’ If you threw a muffin, you would hear a ‘thud!’

Ingredients (yields 1 dozen)
4 large eggs, room temperature
1/4 cup honey
1 teaspoon vanilla extract
1/4 cup coconut oil, melted
1/4 cup coconut milk
1/4 cup coconut flour
1/2 cup blanched almond flour
1/4 cup raw cacao powder
1 teaspoon baking soda
1/2 teaspoon salt
1/4 cup chocolate chips (I use Enjoy Life for soy, dairy, and gluten free)
1/2 cup red cherries, pitted
2 cups whipped cream (either coconut or raw dairy cream)
Cherry Compote Filling
3/4 cup red cherries, chopped
2 tablespoons honey
1 teaspoon lemon juice
1 teaspoon bourbon (optional but makes it really good!)
Directions
Preheat your oven to 350 degrees and line a 12 cup muffin pan with cupcake liners.
In a food processor, process the eggs, melted coconut oil, honey, vanilla and coconut milk until fully combined.
Add the coconut flour, almond flour, cacao powder, baking soda, and salt and process again until smooth. Scrape down the sides of the bowl, then pulse a few more times to make sure everything is mixed well.
Add the whole cherries and pulse once or twice until they are roughly chopped. Stir in the chocolate chips by hand. Pour the batter into the prepared muffin pan, filling each cup to 3/4 full.
Bake for 12-15 minutes. These are dark so it’s hard to tell when they are done by sight, but a toothpick should come out clean and the cake should bounce back when you press your finger gently into the top.
While the cupcakes are cooling, make your cherry compote by combining all of the ingredients in a saucepan over medium-high heat. Simmer for 15 minutes until the cherries are soft and much of the liquid has evaporated. It will still be pretty thin, but as it cools it will turn into a thicker syrup.
Using an apple corer or just a pairing knife, remove a quarter size piece from the top of the cupcake. Be careful not to cut too deep or you’ll cut through the bottom and the filling will seep out.
Fill each cupcake with a tablespoon of the cherry filling, then pipe or spread the whipped cream over top.
*I used raw dairy cream for the photos but we’ve had them with coconut whipped cream and love them just as much. Coconut whipped cream doesn’t hold up for very long after being whipped, so try to frost the cakes no more than 30 minutes prior to serving. 
*********
Two giveaways going on through July 9th! Enter to win: 1) two grain-free cookbooks for all your birthday (and everyday) baking needs; 2) a birthday party giveaway to Mel's shop including an invite design, 25 invites w/envelopes, 25 cupcake toppers and 25 favor tags or stickers. Two lucky winners! 

Leave a comment on this post in order to be considered. Answer the following question: cupcake or muffin?

Friday, July 06, 2012

Realistic Cake Pops: Guest Post from Tales from the Motherhood

Today you have the pleasure of hearing from one of my blogging friends, the always hilarious Wendy Hagen. With so many grain-free recipes being shared this week, I figured you all needed a break. I've tried to make cake pops before, and let me just say, I'm glad Wendy is keepin' it real. With no further ado, here's a little bit about Wendy...


When Wendy was nine-years-old she looked in the yellow pages, found a talent agency, and called and left a message letting them know that she was ready to be on television. Unbeknownst to her parents. That started her acting career which eventually led her to Hollywood as a teenager where she starred in The New Lassie and guest starred on The Wonder Years and Growing Pains. She left Hollywood and headed back to the Bay Area to finish out a normal senior year of high school. 

Wendy went on to UCLA where she was on the dance team, in leadership with Athletes in Action, and met her husband of 13 years -- Shiloh. Wendy no longer gets paid for entertaining, but she is constantly entertaining her eight-year-old Elijah, her very strong-willed five-year-old Lydia, and her temperamental three-year-old Jordis.

Wendy and Shiloh live in the San Francisco Bay Area and are active at their church Cornerstone Fellowship in Livermore and lead a college/young adult life group at their home every week. Wendy loves Jesus and is passionate about sharing her faith and encouraging women in their faith and in the motherhood. She also loves blogging, Persian food, hot chocolate, So You Think You Can Dance, Settlers of Catan, and family vacations.

In a moment of temporary insanity and a lot of late nights Wendy decided to write a book of humor and encouragement for fellow moms and moms-to-be called Totally Desperate Mom: Keepin’ it Real in the Motherhood.


Right now the Plum District has a deal going on Wendy's book! Be sure to head over and get yourself this funny, engaging, uplifting read (and help a local women's shelter in the meantime). Check it out.


********


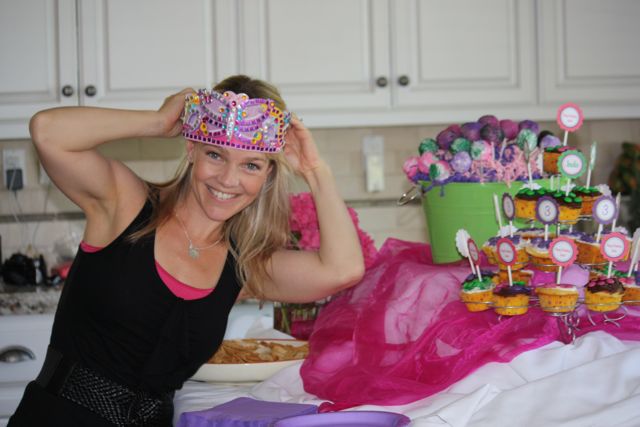
For Jordis's third birthday party I decided to make cupcakes and cake pops. Because I wanted to eat one or twenty. So I browsed recipes and got some tips from my Tweeps.

Here is the best of what I learned about cake poppin'.

But just know that to make picture-perfect cake pops like the ones you might see on a crazy baker web site or over at Crazy Crafty Christina's blog you will need a strong Type-A personality, special tools, the perfect dipping chocolate, and a fancy camera. I have none of those items, but I did borrow my sister-in-law's nice camera for the party.

So my recipe, if you will, is for . . .
Realistic Cake Pops
Good-Enough Cake Pops
Not-Necessarily-Perfectly-Round-or-Smooth Cake Pops
Most-Likely-To-Not-Be-Featured-on-Bakerella.com Cake Pops
Cake Pops for the Craftily Challenged

Here you go:

1. Make and bake a cake. Preferably not in an Easy-Bake Oven. Let your kids stir up the mix a bit cuz they will remember it fondly when they grow up.


2. Let it cool.

3. Take the cake out of the pan, bash it up, and put it in a large mixing bowl, not a fish bowl.
I did one batch of chocolate cake and vanilla frosting and one batch of yellow cake with chocolate frosting. Both of them were delicious and overly consumed by moi.

4. Add at least 1/2 of the tub of artery clogging, artificial everything frosting to the bashed up cake.
Special Tip #1 - Probably best to add a little more than 1/2 the tub of frosting. It makes for some good glue to hold the ball together and if you don't put enough in, they get a little cracky.

5. Mix the cake and frosting with a fork until you are bored. Then use your hands until it is thoroughly mixed and begging to be shaped into balls.

6. Roll that mixture into balls with your hands.


Let your kids help you with this, but don't expect the balls to be perfectly bally. But who cares? It's for a three-year-old's birthday party, not a magazine cover. Unless it's for a magazine cover - in that case just go buy the cake pops. Make the balls not too big, not too small. Maybe about the size of a walnut. Unless walnuts greatly vary in size (do they?). If that's the case, I don't know what to tell you.


7. Put the balls on a cookie/baking sheet lined with wax or parchment paper and put in your refrigerator for at least an hour.
Some internet peeps said to freeze, others said that freezing them was lame. Don't leave the balls in there for more than 24 hours or they begin to dry out.

8. Get some melting chocolates and put them on the stove in a non-stick pot to melt.
Special Tip #2: Don't use a stainless steel pot like I did with my first batch of purple melting junk. Because well, it just doesn't work and I had to toss it.

9. Dip the tip of fancy sticks you bought from a craft store or ones you collected from the tootsie pops your kids just ate, into the melted chocolate and then stick it about half way into the ball.

10. Stick all the balls (now with sticks in them) back in the fridge so that chocolate, (which acts like glue, but won't get you high), will harden.


10. After a few minutes, take out one pop at a time and begin the arduous dipping process. And by dipping I mean DON'T DIP!
Use a spoon to drip the chocolate onto the ball. Get it all over that bad boy. I am sure the unrealistic cake pop recipes have a fancy way of doing this so the chocolate goes on perfectly smooth. But I am sure that is more time consuming and stressful so just get the surface of the ball covered and move on with your life.

11. After the ball is unevenly lathered with the melting chocolate then shake on your sprinkles, chocolate chips, shards of glass, or whatever else you think would make a great topping for your pops.

12. Stick the pops in a flat piece of styrofoam.
We always throw away styrofoam when it comes in packaging because our cats eat it and then puke it up. (Who says styrofoam is not recyclable? Tell that to my cats.) Therefore, I had to buy a piece of styrofoam at the craft store . . . perhaps the most painful part of my cake-pop journey.


I made a cake-pop bouquet with some of the cake pops (on an $8 styrofoam ball!) and covered others with treat bags and ribbon as party favors.


Special Tip #3 If you make your balls too big or they won't fit into the treat bags and you will have to eat them right there on the spot.


The birthday girl loved the cake pops = success!


The birthday girl's mom loved the cake pops = cake pop booty.


The cake pops were time consuming to make, but if you follow my special tips and don't expect perfection then they are not difficult to make. My goal is to never to make them again simply because they tasted incredible and I ate too many and I don't want to get fat and have health issues.

*********

The giveaway is STILL going strong, through July 9th! Enter to win: 1) two grain-free cookbooks for all your birthday (and everyday) baking needs; 2) a birthday party giveaway to Mel's shop including an invite design, 25 invites w/envelopes, 25 cupcake toppers and 25 favor tags or stickers. Two lucky winners! 

Leave a comment on this post in order to be considered. Answer me this: when it comes to crafty, where do you fall on a scale of "realistic" to Martha? (Me, I like to pretend I'm a Martha but when it comes down to it, I'm too lazy to always follow through. Probably halfway between the two.)

Wednesday, July 04, 2012

Party Planning like a Pro: Guest Post by Mel of The Larson Lingo

My good friend Mel from The Larson Lingo is our guest blogger today. I can think of no better person to post on the 4th of July, as Mel is a party-planner extraordinaire! My kids have been invited to many a Larson party and each and every one gets better; every detail well thought-out and beautiful. I hope you enjoy her helpful and thorough post. Read all the way to the bottom for a chance to be entered in TWO awesome giveaways. But first, a bit about Mel:


Mel is married to her best friend Kevin. She loves Jesus, her family, photography, soccer, coffee and wine. Mel is a full-time mommy to two girls with Baby #3 due next month. She is a part-time 7th grade teacher and soccer coach. Mel also designs birth announcements, invitations and holiday cards in the wee hours of the night. Boulder the wonder dog completes their family. Welcome Mel!


*********
was thrilled when Becky asked me to post for her birthday week. I love Becky & I love Birthday parties!

My love for planning parties exploded after I had my first daughter, Kate. I had so much fun planning her first birthday party and since then, my love for parties has increased 10 fold. I thought I would share some party planning tips that I have learned over the past 5 years of planning birthday parties. These will work if you are planning a small party or a larger party.


1. Pick a theme
I am all about the theme. I try and pick a theme that is reflective of what my girls like at that time in their life. I give them suggestions on what their party theme could be and sometimes they go with it and sometimes they pick something totally different. For example, for Kate's 4th birthday, she wanted a Cinderella party. I am not a fan of the "commercialized" themes but she was all about Cinderella and no other party theme would do, so of course we had a Cinderella party. I didn't use a lot of Cinderella decorations, but mostly used the Cinderella blue & purple (to incorporate Kate's favorite color)

When you pick a theme, it helps with the party planning because:
1. It focuses on what your child likes at that age (and will be fun to look back on)
2. It gives you direction & focus for the party
3. You can get creative with decor, food & games for the party if you have a theme

2. Invitations


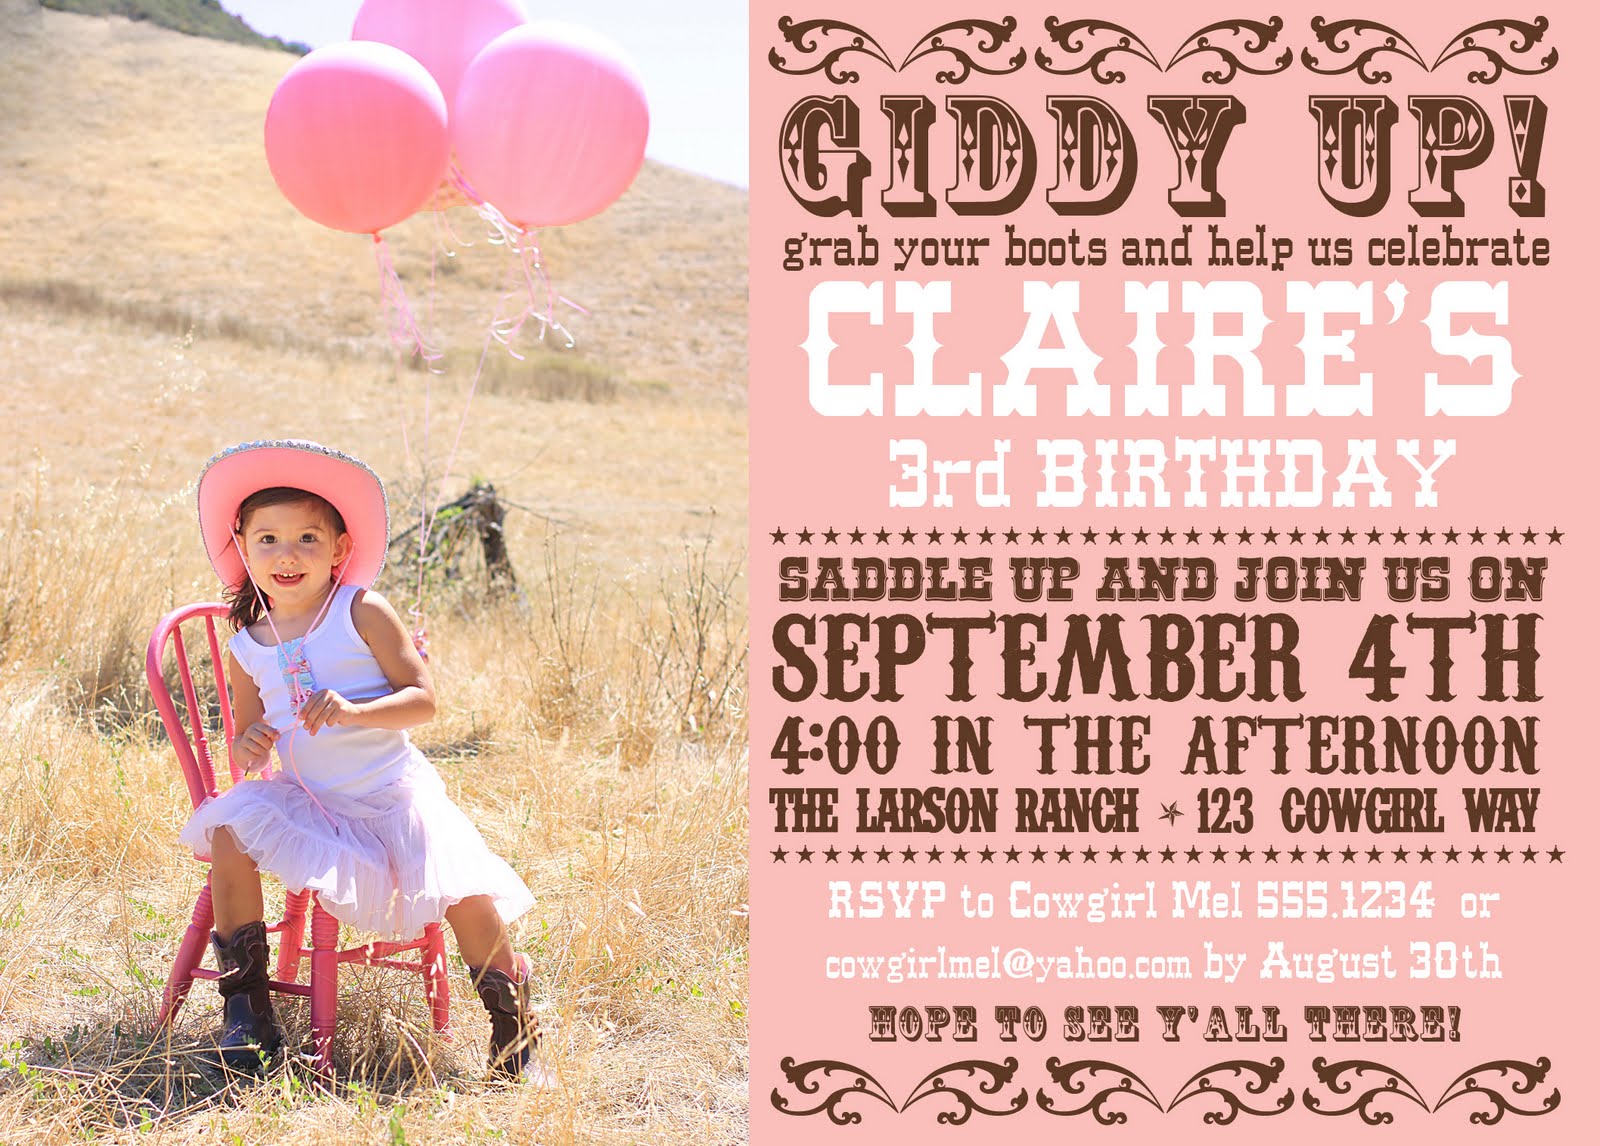
Once you have your theme, it's time to send out invitations. To me, the invite sets the tone and gets people excited for the party. You can make your own invites, send out an evite or order one. I learned how to make my own invites in photoshop, but if you don't know how to do that, you can make some with scrapbooking supplies or order them online. I like including a photo on my invites (mostly so that I can look back & see how my girls have changed over the years). Don't know how to make your own? No fear...stay tuned for a giveaway from my Etsy shop at the end of this post!

3. Plan Ahead
I am some what obsessive about planning parties for my girls. I will start planning them in my head 9 months before their birthday. (Yes, I know I am crazy). Once we have a theme picked out, I keep my eye out for things on sale/clearance the months before the party. For Kate's Cinderella Party, I was able to get Cinderella books in the $1 spot at Target 4 months before her party. These were the perfect party favor for her guests. And, for her Rainbow Art party, I got markers, crayons & notepads for $.50 during Target's Back to School Sale (6 months before her party!)

I also keep a list of what needs to be done for the parties in a notebook. This way I can map out things I need to get done ahead of time.
6 weeks before the party I make the guest list, create the invites & go shopping for party goods like plates, napkins & cups.
1 month before the party, I mail out the invites.
2-3 weeks before the party I make the cupcake toppers, food labels, favor tags & other decorations.
1-2 weeks before the party, I have the favors & favor tags ready to go.
The week of the party is spent with last minute prep & food shopping.
The night before the party, I usually stay up WAY too late getting last minute things done, like food prep & cupcakes. But as I throw more parties, I am getting my groove down and not leaving as many* things to the last minute.
The more I plan ahead, the more relaxed I am (and my family is) on party day!

4. Location, Location, Location.
Before we moved to our current house (2 years ago) I always had my girls' parties at locations other than our house (our old house was small & had a tiny backyard). So, I used other locations like my parents house, the park, our neighborhood clubhouse & an indoor bounce house place). But, for the past 2 years, the girls' parties have been held at our house. I prefer having the parties at my house (but I know other people who avoid having parties at their house so they don't have to deal with the clean up, which, I agree is fabulous)
The reason I like having them at my house is so that I don't have to lug stuff from my house to the party place. I like having everything I need at my house & it allows me to focus more on the little details of the party (food labels, dessert tables, etc). I LOVE doing dessert tables!

Again, this is personal opinion, so to each her own!

5. Know your Limits & Have Fun!
If party planning & throwing parties for your kids stresses you out, then don't go overboard.
Many times people have asked me how I handle throwing parties for my girls.
The reality is, I thrive on throwing parties. I LOVE it. It doesn't stress me out at all.
I enjoy spending hours on pinterest getting party inspiration.
I love thinking of all the little details to make each party special.
I love seeing the theme come together.
I love creating all the handmade food labels & cupcake toppers.
I love when my girls tell me they had the best day ever at their party.
If this type of thing just adds stress to your life, then know your limits and keep the party simple so that you aren't overwhelmed!

You can click HERE to see all the parties I have thrown in the past 5 years.

Again, there is so much more I could expand on, but these are 5 little tips that will help you with your next party! And, to make your life even easier, I am offering a giveaway to 1 lucky reader!


The winner will win an invite design from my etsy shop, 25 invites/envelopes, 25 cupcake toppers & 25 favor tags/stickers.


Hooray for Birthday Parties!


*********

Another day, another chance to be entered in the big birthday giveaway! Leave a comment on this post to be entered in a chance to win two awesome cookbooks. 

AAANNDDDD...bonus giveaway, starting today! One lucky commenter will be awarded the giveaway to Mel's shop in addition to being entered in the cookbook giveaway. Leave a comment below for a chance to win a giveaway to Mel's etsy shop.

Answer this: party planner or party pooper?