Showing posts with label giveaway. Show all posts

Saturday, September 13, 2014

Intro to Paleo Cooking & Giveaway!

A NIGHT OF SHARING TECHNIQUES, TRICKS & RECIPES

Open to: Anyone interested in cooking Paleo, Gluten-free or Grain-free dishes

SAVE THE DATE
October 18th OR November 15, 2014


<><><><><><><><><><><><><><><><><><><><><><><><><><><><><><><><><><><><><><><><>


Whether you are interested in learning more about Paleo cooking, or you've been cooking gluten-, grain-, or dairy-free for years, this is an opportunity for you to come together with other folks for a night of sampling good food, enjoying good company, and getting equipped with delicious and nutritious recipes to add to your weekly meal rotation.


Main Dishes
Snacks

Cocktails, reimagined

Salads

Soups

Cookies, Cakes & Donuts!


My 34th Birthday Cake! Recipe here


AND... A PALEO COOKING GIVEAWAY!

One lucky participant in our fun night of sharing will walk away with my favorite Paleo cookbooks as well as some fun baking supplies and treats!


  TO RSVP: leave your name and email address (if I don't already have it from IG or FB) in the comments below! Let me know which date works best for you. Stay tuned for more details! XOXO

Thursday, July 12, 2012

My 34th Birthday, Part 2: Mile-High Chocolate Cake with Swiss Meringue & Strawberries


The search for the perfect grain-free birthday dessert was well worth it! After trying a bunch of different recipes, I eventually just developed my own chocolate cake recipe and it was AMAZING! It was so fun to mess around in the kitchen, experimenting with different flavors, all in the name of a delightful birthday dessert.

The chocolate cake recipe started as the bottom layer of the Neapolitan Cake, which was delicious to start but only improved with time and trial. For the ice cream sandwich version, I added extra cacao powder and sweetened it with extra honey. For this final recipe revision, I added even more cacao powder, more honey, and an additional, special ingredient: coffee!! The trick is adding just enough to enrich and bolster the chocolate flavor of the cake without overpowering it. I'd say that this recipe knocks the others out of the park!

Once I had decided on the cake flavor, I decided to return to the light and fluffy Swiss Meringue Buttercream from the Neapolitan Cake. This time I diced strawberries to pile on top of each frosting layer as well as adding chocolate curls to the top.

As far as cake aesthetics go, I'm never happy with a plain old sheet cake or even a two-layer cake anymore. Once I started on three-layer cakes, I just couldn't go back. (Then my hubby stole my Sur la Table 9-inch cake pans for his coffee roaster, but that's another story for another time). The trick to this tall cake? Cutting the two cake layers in half, making for four thin sections of cake to pile with buttercream and strawberries. This is definitely a cake worth making, but only with the sweetest, in-season berries.


Mile-High Chocolate Cake with Swiss Meringue Buttercream & Strawberries
serves 12-16

3 1/2 C. blanched superfine almond flour (I use Honeyville, purchased through Amazon)
1 C. cacao powder
1/2 tsp. salt
1/2 tsp. baking soda
1 C. honey
6 eggs
1 TBS pure vanilla extract
1 TBS instant coffee (or up to 1/4 C. very strong coffee, brewed and cooled)
8 TBS butter, softened

Swiss Meringue (adapted from Roost)
4 room temperature egg whites
squeeze of lemon juice
1 C. honey
2 C. strawberries, diced
2 TBS dark unsweetened chocolate

For the cake layers:
Preheat oven to 350F. Spray two 8-inch cake pans with oil and line with a circle of parchment paper cut to size.

Combine almond flour, cacao powder, salt and baking soda in the bowl of an electric stand mixer fitted with paddle. Combine on medium speed until well mixed.

Add to mixing bowl: honey, eggs, and vanilla extract. Combine well on medium speed.

Finally, stir in coffee and softened butter. Beat on medium-high speed until smooth and well combined, and no streaks of butter remain (about 3 minutes).

Divide mixture between two prepared cake pans. Bake at 350F for 22-25 minutes, or until a toothpick inserted in center of cake comes out with just a few crumbs attached.

Allow cakes to cool in pans on wire rack for about 10 minutes. After 10 minutes, carefully invert onto wire rack and allow cakes to cool completely to room temperature.

For the swiss meringue:
When cakes are completely cool, make buttercream. Put egg whites in the bowl of an electric stand mixer fitted with the whisk. Squeeze in a little lemon juice and whisk at medium-high to high speed until stiff peaks form, about 4-5 minutes. Meanwhile, bring honey to a boil in a saucepan over high heat.

After stiff peaks have formed and when honey is boiling, with mixer running, slowly and carefully drizzle honey into egg whites. Once honey is completely added, run mixer for a minute more.

To assemble cake:
Cut cake layers in half horizontally, carefully, using a serrated knife. Place first layer, cut side up, on a cake stand. Cut three rectangles measuring about 3 inches wide from parchment paper. Place them just under edges of cake, overlapping, to keep meringue from messing up the cake stand. Pile about 1/4 of the meringue on top of the first layer. Top with about 1/2 C. of the diced strawberries.

Repeat with second layer of cake, 1/4 of the meringue, 1/2 C. of strawberries. Repeat again with 3rd layer. 

For top layer, place cake cut side down. Top with remaining meringue and strawberries. Using a grater, grate chocolate curls onto top of strawberries. Carefully remove parchment paper rectangles from under cake.

Serve immediately, or place in fridge until serving time, carefully wrapped in saran wrap (or under cake dome).

Hooray! You have a beautiful, delicious, rich cake that is completely grain- and sugar-free! Enjoy!

Wednesday, July 11, 2012

My 34th Birthday, Part 1 of 3

I celebrated my 34th birthday on Monday with just a handful of good friends. This first post will be the photo extravaganza!! Post two will be the recipe for the cake (after a trial of three previous recipes, as chronicled here, here, and here). The third and final birthday post will be about the wine and food pairing process. Fun, fun!
I decided on a wine and food pairing party because 1) I love wine and it is good for digestion (true story. Read 1 Timothy 5:23), 2) cheese is my FAVORITE food of all time, and 3) we have three amazing homemade wines to showcase and share with our friends.

I saw an idea on pinterest a while back that incorporated a chalkboard surface into a tasting party. Ben had the great idea of spray painting the reverse side of our marble outdoor table with chalk paint. It totally worked and now we have a great writing/decorating surface for future parties and boring afternoons at home.


Some photos of the spread/food:

Wine + cheese + nuts + food pairings = JOY!
Cheese, cheese, olives and salami. Nom nom nom
Wine, glasses, and some yummy steak bites with blue cheese

 The lovely folks who helped me celebrate:

Da Fellas: Andrew, John, Beau, Gregg, Ben & Lee
Some ladies & kiddos: Janet, moi, Sam, Maddie, Kelly & Susan 
Gregg tells a story, Maddie snuggles with Suz, Andrew & Bridgette
Listening to my toasts, John & Janet, Bridgette & Lee


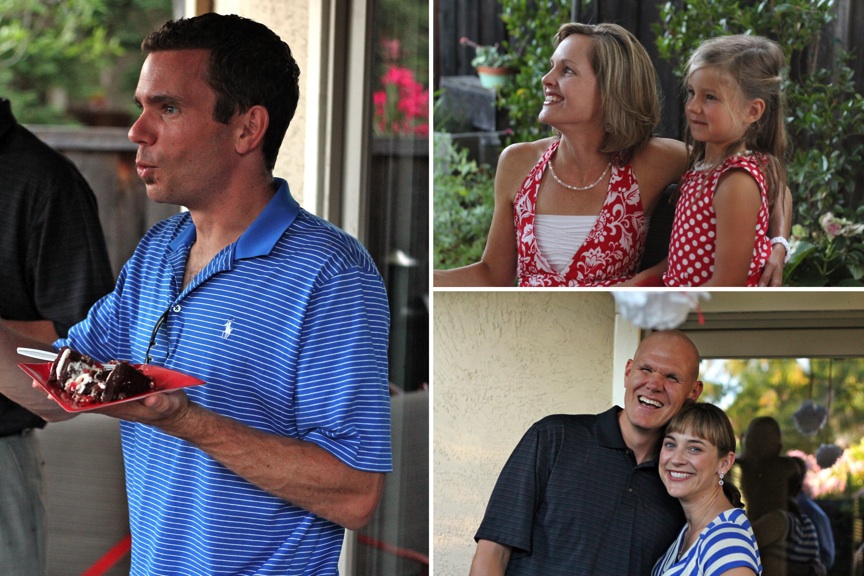
Lots of photos of the birthday girl!!! (nice to be on the other side of the camera for a change): 
cheese & salami plus well-earned 34 year-old forehead wrinkles :)
It's not a party until you've got an open-mouth cheesy photo!
Me and my little man
Mama, Sam & Daddy
 Cake time:
Mile-High Chocolate Cake with Swiss Meringue Buttercream & Fresh Strawberries (recipe coming tomorrow)

is your mouth watering yet?

Trying not to catch my hair on fire

Sam enjoys the grain-free, sugar-free cake!

Sam hates the attention he gets from my besties

SO thankful for this man!!!

Toasts to the birthday girl:

I think Bridgette might be telling the story about my delirium when sick in the hospital
Maddie gives a toast--the sweetest words ever!!!
This picture pretty much captures our love and pride for Maddie's toast!
Big hugs and big tears in my eyes

He's just delicious. That's all there is to say.

I got lots of kiddo loves that night! Best bday present ever!

Sweet Suz

Lovely Janet

thanking everyone for a MOST lovely night!

Tune in tomorrow for part two. Hope you've enjoyed the photos! I've enjoyed re-living a most wonderful, love-filled, delicious evening.

Tuesday, July 10, 2012

Birthday Giveaway Winners Announced


the final cake: Mile-High Chocolate Cake with Swiss Buttercream & Strawberries


After a week of anticipating and celebrating my birthday, it's time to give a gift to one of you!

CONGRATULATIONS TO: 


elektricshaver (Jessica, is that YOU?!)

Email me your address and I'll send off your copies of
Eat Well Feel Well by Kendall Conrad
The Gluten-Free Almond Flour Cookbook by Elana Amsterdam

and also to:

Tiffany


send me your email address and I'll put you in touch with Mel for your Party Package
invite design, 25 invites/envelopes, 25 favor tags/stickers, & 25 cupcake toppers

Happy grain-free cooking! Thanks to everyone who participated!

Birthday recap post coming soon...

Monday, July 09, 2012

Happy Birthday to Me & A Very Merry Unbirthday to You!

Today is the last day to comment, dear readers! Enter one more comment in order to be considered in the giveaway of two amazing grain-free cookbooks


PLUS, an awesome giveaway to Mel's etsy shop: invite design, 25 invites/envelopes, 25 stickers/favor tags and 25 cupcake toppers! Two winners! Hooray! A very merry unbirthday, indeed. :)


Winner will be announced tomorrow.


A big thank you to Wendy, Mel & Danielle for their guest posts and mostly for their friendship! Love you girls!

Sunday, July 08, 2012

Black Forest Cupcakes: Guest Post from Against All Grain

Today you have the pleasure of hearing from my friend & neighbor, the incredibly talented Danielle from Against All Grain. I have the joy of getting to taste test several treats as Danielle is in various stages of recipe development. It's a tough job, but somebody's gotta do it. In search of the perfect grain-free birthday dessert, I have to say, her black forest cupcakes are pretty hard to top.


Danielle Walker is the author and creator of 
the grain-free recipe blog, Against All Grain (againstallgrain.com). She is first and foremost a devoted wife and loving mom to her wonderful husband and rambunctious toddler, but finds joy in her spare time developing tasty recipes for those on restricted diets.  Using grain-free flours such as coconut and almond flour, she creates familiar comfort foods that leave people 
with food allergies feeling satisfied rather than deprived.  Her passion is to share with everyone that eating a diet of real, healthy foods does not mean living in a world of bland and uneventfulfood. All of the recipes on Against All Grain are grain-free, gluten-free, refined sugar-free, and low to minimal dairy.
*********

black forest cupcakes with whipped cream frosting

Untitled
You may remember the great cupcake vs muffin debate we had on Facebook a few weeks ago. I asked you which recipe you’d like to see first and it was a pretty even split, but muffins won by just a hair. I posted the recipe for my Cherry Chocolate Muffins first, and now it’s your moment cupcake lovers!
You’re probably asking yourself what the difference is between a muffin and cupcake. They are both cake like baked goods that come in a small single serving wrapper right? I’d say the biggest distinction between the two is frosting or no frosting. Muffins are also generally a little more dense than a cupcake and typically less sweet (although there are SO many exceptions to that rule!).
While I was developing this recipe, I came out with a few batches that were meant to be muffins but were just too sweet and a little too fluffy to feel like a fulfilling breakfast bread. So instead of forcing them into one category or another, I just made recipes for both!
The cupcakes use coconut oil while the muffins use cacao butter, and the cupcakes have a cherry compote filling and then are topped with a sweet whipped cream. These do fall in the center a little more than the muffins, so don’t be alarmed if they sink a bit after you’ve removed them from the oven. You’ll be filling the center and covering it up with frosting anyways!
Two little treats that seem alike, but have such different flavor profiles!
And lastly, here’s a funny little difference I read: “If you threw a cupcake against the wall, you would hear something of a ‘poof!’ If you threw a muffin, you would hear a ‘thud!’

Ingredients (yields 1 dozen)
4 large eggs, room temperature
1/4 cup honey
1 teaspoon vanilla extract
1/4 cup coconut oil, melted
1/4 cup coconut milk
1/4 cup coconut flour
1/2 cup blanched almond flour
1/4 cup raw cacao powder
1 teaspoon baking soda
1/2 teaspoon salt
1/4 cup chocolate chips (I use Enjoy Life for soy, dairy, and gluten free)
1/2 cup red cherries, pitted
2 cups whipped cream (either coconut or raw dairy cream)
Cherry Compote Filling
3/4 cup red cherries, chopped
2 tablespoons honey
1 teaspoon lemon juice
1 teaspoon bourbon (optional but makes it really good!)
Directions
Preheat your oven to 350 degrees and line a 12 cup muffin pan with cupcake liners.
In a food processor, process the eggs, melted coconut oil, honey, vanilla and coconut milk until fully combined.
Add the coconut flour, almond flour, cacao powder, baking soda, and salt and process again until smooth. Scrape down the sides of the bowl, then pulse a few more times to make sure everything is mixed well.
Add the whole cherries and pulse once or twice until they are roughly chopped. Stir in the chocolate chips by hand. Pour the batter into the prepared muffin pan, filling each cup to 3/4 full.
Bake for 12-15 minutes. These are dark so it’s hard to tell when they are done by sight, but a toothpick should come out clean and the cake should bounce back when you press your finger gently into the top.
While the cupcakes are cooling, make your cherry compote by combining all of the ingredients in a saucepan over medium-high heat. Simmer for 15 minutes until the cherries are soft and much of the liquid has evaporated. It will still be pretty thin, but as it cools it will turn into a thicker syrup.
Using an apple corer or just a pairing knife, remove a quarter size piece from the top of the cupcake. Be careful not to cut too deep or you’ll cut through the bottom and the filling will seep out.
Fill each cupcake with a tablespoon of the cherry filling, then pipe or spread the whipped cream over top.
*I used raw dairy cream for the photos but we’ve had them with coconut whipped cream and love them just as much. Coconut whipped cream doesn’t hold up for very long after being whipped, so try to frost the cakes no more than 30 minutes prior to serving. 
*********
Two giveaways going on through July 9th! Enter to win: 1) two grain-free cookbooks for all your birthday (and everyday) baking needs; 2) a birthday party giveaway to Mel's shop including an invite design, 25 invites w/envelopes, 25 cupcake toppers and 25 favor tags or stickers. Two lucky winners! 

Leave a comment on this post in order to be considered. Answer the following question: cupcake or muffin?

Saturday, July 07, 2012

in search of the perfect grain-free birthday dessert: ice cream sandwiches

My third variation on a birthday cake recipe takes the classic birthday dessert plate of cake and ice cream together in a fun, tasty, refreshing treat: ice cream sandwiches. There is something both comforting and nostalgic about biting into a triple-layer of soft chocolate and ice cold cream. The goodness of these little birthday desserts is that they are grain and dairy free.

I couldn't decide between ice cream flavors, so I went ahead and used both mint chip and chocolate peanut butter. My distinguished panel of tasters (hi, family!) thought both were delicious and had a hard time selecting a favorite. Chocolate lovers tend to prefer the sandwiches containing chocolate peanut butter ice cream, but believe me that both hit the spot on a warm day.


I envisioned taking these cute cupcake-sized desserts on a fourth of July picnic. With my sweet girl, we created a sweet and sunny picnic in our backyard. It was a treat for both of us to get dressed up, put on some red lipstick, and sample the goodies. 

We packed up our suitcase with sweets and headed outside.


For a little girl who usually doesn't love posing for the camera, it was fun to see her get into character and even more fun to apply mascara and lipstick (her first time). I can see many more photo shoots in her future!


And if bite-sized isn't big enough when your birthday rolls around, then go ahead and make a gigantic ice cream sandwich in a cake pan! Why not?!


*********

Ice Cream Sandwiches (really just chocolate cupcakes with ice cream sandwiched between layers!)
makes 16 sandwiches


3 1/2 C. blanched almond flour
3/4 C. cacao powder
1/2 tsp. salt
1/2 tsp. baking soda
3/4 C. honey
6 eggs
1 TBS pure vanilla extract
8 TBS butter, softened

1 quart ice cream, any flavor (see below)

For the cupcake layer:
Preheat oven to 350F. Thoroughly oil two cupcake pans.

Using a metal whisk, combine almond flour, cacao powder, salt and baking soda in the bowl of a stand mixer until well-mixed.

Add honey, eggs, and vanilla to bowl. Then, using the paddle attachment of stand mixer, combine on medium speed until wet ingredients are incorporated into dry.

Finally, add the softened butter and combine on medium speed until fully incorporated.

Pour mixture into prepared cupcake pans, filling each cup about 3/4 full. Bake in preheated oven for 14-16 minutes, or until a toothpick inserted in center comes out clean.

Cool in pan on wire rack for 10 minutes. Then, using the edge of a small spatula, loosen cupcake around edges until you can feel it release completely from pan. Carefully remove onto wire rack to cool completely.

For the ice cream layer:
Ice cream layer suggestions...

Mint Chip Ice Cream by Danielle at Against all Grain


Double Chocolate Ice Cream with Peanut Butter Swirl by Danielle at Against all Grain


Line two cupcake pans with plastic wrap. You can either use one big sheet and push down to layer inside each cup, or cut small plastic wrap squares for each cup.

Scoop out approximately 1/4 cup of ice cream into 16 cupcake slots. Press down to flatten and spread out, filling bottom of cupcake slot. Wrap entire cupcake pan tightly with a double layer of plastic wrap and place in freezer until ice cream is hard.

To assemble sandwiches:
Remove prepared ice cream in cupcake pans from freezer. Slice each cupcake in half horizontally. Place a disk of frozen ice cream on bottom layer of cupcake and sandwich with the top layer. Serve immediately or wrap tightly in a double layer of plastic wrap and store in freezer until serving time.

Optional:
To create a large ice cream cake, simply pour batter into two prepared six-inch cake pans and cook for 25-30 minutes at 350F. For ice cream layer, line two six-inch cake pan with plastic wrap and fill halfway with ice cream. Freeze as directed above. Slice cake in half, sandwich ice cream between. Serve immediately or double-wrap and freeze until serving time.


Friday, July 06, 2012

Realistic Cake Pops: Guest Post from Tales from the Motherhood

Today you have the pleasure of hearing from one of my blogging friends, the always hilarious Wendy Hagen. With so many grain-free recipes being shared this week, I figured you all needed a break. I've tried to make cake pops before, and let me just say, I'm glad Wendy is keepin' it real. With no further ado, here's a little bit about Wendy...


When Wendy was nine-years-old she looked in the yellow pages, found a talent agency, and called and left a message letting them know that she was ready to be on television. Unbeknownst to her parents. That started her acting career which eventually led her to Hollywood as a teenager where she starred in The New Lassie and guest starred on The Wonder Years and Growing Pains. She left Hollywood and headed back to the Bay Area to finish out a normal senior year of high school. 

Wendy went on to UCLA where she was on the dance team, in leadership with Athletes in Action, and met her husband of 13 years -- Shiloh. Wendy no longer gets paid for entertaining, but she is constantly entertaining her eight-year-old Elijah, her very strong-willed five-year-old Lydia, and her temperamental three-year-old Jordis.

Wendy and Shiloh live in the San Francisco Bay Area and are active at their church Cornerstone Fellowship in Livermore and lead a college/young adult life group at their home every week. Wendy loves Jesus and is passionate about sharing her faith and encouraging women in their faith and in the motherhood. She also loves blogging, Persian food, hot chocolate, So You Think You Can Dance, Settlers of Catan, and family vacations.

In a moment of temporary insanity and a lot of late nights Wendy decided to write a book of humor and encouragement for fellow moms and moms-to-be called Totally Desperate Mom: Keepin’ it Real in the Motherhood.


Right now the Plum District has a deal going on Wendy's book! Be sure to head over and get yourself this funny, engaging, uplifting read (and help a local women's shelter in the meantime). Check it out.


********


For Jordis's third birthday party I decided to make cupcakes and cake pops. Because I wanted to eat one or twenty. So I browsed recipes and got some tips from my Tweeps.

Here is the best of what I learned about cake poppin'.

But just know that to make picture-perfect cake pops like the ones you might see on a crazy baker web site or over at Crazy Crafty Christina's blog you will need a strong Type-A personality, special tools, the perfect dipping chocolate, and a fancy camera. I have none of those items, but I did borrow my sister-in-law's nice camera for the party.

So my recipe, if you will, is for . . .
Realistic Cake Pops
Good-Enough Cake Pops
Not-Necessarily-Perfectly-Round-or-Smooth Cake Pops
Most-Likely-To-Not-Be-Featured-on-Bakerella.com Cake Pops
Cake Pops for the Craftily Challenged

Here you go:

1. Make and bake a cake. Preferably not in an Easy-Bake Oven. Let your kids stir up the mix a bit cuz they will remember it fondly when they grow up.


2. Let it cool.

3. Take the cake out of the pan, bash it up, and put it in a large mixing bowl, not a fish bowl.
I did one batch of chocolate cake and vanilla frosting and one batch of yellow cake with chocolate frosting. Both of them were delicious and overly consumed by moi.

4. Add at least 1/2 of the tub of artery clogging, artificial everything frosting to the bashed up cake.
Special Tip #1 - Probably best to add a little more than 1/2 the tub of frosting. It makes for some good glue to hold the ball together and if you don't put enough in, they get a little cracky.

5. Mix the cake and frosting with a fork until you are bored. Then use your hands until it is thoroughly mixed and begging to be shaped into balls.

6. Roll that mixture into balls with your hands.


Let your kids help you with this, but don't expect the balls to be perfectly bally. But who cares? It's for a three-year-old's birthday party, not a magazine cover. Unless it's for a magazine cover - in that case just go buy the cake pops. Make the balls not too big, not too small. Maybe about the size of a walnut. Unless walnuts greatly vary in size (do they?). If that's the case, I don't know what to tell you.


7. Put the balls on a cookie/baking sheet lined with wax or parchment paper and put in your refrigerator for at least an hour.
Some internet peeps said to freeze, others said that freezing them was lame. Don't leave the balls in there for more than 24 hours or they begin to dry out.

8. Get some melting chocolates and put them on the stove in a non-stick pot to melt.
Special Tip #2: Don't use a stainless steel pot like I did with my first batch of purple melting junk. Because well, it just doesn't work and I had to toss it.

9. Dip the tip of fancy sticks you bought from a craft store or ones you collected from the tootsie pops your kids just ate, into the melted chocolate and then stick it about half way into the ball.

10. Stick all the balls (now with sticks in them) back in the fridge so that chocolate, (which acts like glue, but won't get you high), will harden.


10. After a few minutes, take out one pop at a time and begin the arduous dipping process. And by dipping I mean DON'T DIP!
Use a spoon to drip the chocolate onto the ball. Get it all over that bad boy. I am sure the unrealistic cake pop recipes have a fancy way of doing this so the chocolate goes on perfectly smooth. But I am sure that is more time consuming and stressful so just get the surface of the ball covered and move on with your life.

11. After the ball is unevenly lathered with the melting chocolate then shake on your sprinkles, chocolate chips, shards of glass, or whatever else you think would make a great topping for your pops.

12. Stick the pops in a flat piece of styrofoam.
We always throw away styrofoam when it comes in packaging because our cats eat it and then puke it up. (Who says styrofoam is not recyclable? Tell that to my cats.) Therefore, I had to buy a piece of styrofoam at the craft store . . . perhaps the most painful part of my cake-pop journey.


I made a cake-pop bouquet with some of the cake pops (on an $8 styrofoam ball!) and covered others with treat bags and ribbon as party favors.


Special Tip #3 If you make your balls too big or they won't fit into the treat bags and you will have to eat them right there on the spot.


The birthday girl loved the cake pops = success!


The birthday girl's mom loved the cake pops = cake pop booty.


The cake pops were time consuming to make, but if you follow my special tips and don't expect perfection then they are not difficult to make. My goal is to never to make them again simply because they tasted incredible and I ate too many and I don't want to get fat and have health issues.

*********

The giveaway is STILL going strong, through July 9th! Enter to win: 1) two grain-free cookbooks for all your birthday (and everyday) baking needs; 2) a birthday party giveaway to Mel's shop including an invite design, 25 invites w/envelopes, 25 cupcake toppers and 25 favor tags or stickers. Two lucky winners! 

Leave a comment on this post in order to be considered. Answer me this: when it comes to crafty, where do you fall on a scale of "realistic" to Martha? (Me, I like to pretend I'm a Martha but when it comes down to it, I'm too lazy to always follow through. Probably halfway between the two.)