
Today you have the pleasure of hearing from one of my blogging friends, the always hilarious Wendy Hagen. With so many grain-free recipes being shared this week, I figured you all needed a break. I've tried to make cake pops before, and let me just say, I'm glad Wendy is keepin' it real. With no further ado, here's a little bit about Wendy...
 When Wendy was nine-years-old she looked in the yellow pages, found a talent agency, and called and left a message letting them know that she was ready to be on television. Unbeknownst to her parents. That started her acting career which eventually led her to Hollywood as a teenager where she starred in The New Lassie and guest starred on The Wonder Years and Growing Pains. She left Hollywood and headed back to the Bay Area to finish out a normal senior year of high school.
Wendy went on to UCLA where she was on the dance team, in leadership with Athletes in Action, and met her husband of 13 years -- Shiloh. Wendy no longer gets paid for entertaining, but she is constantly entertaining her eight-year-old Elijah, her very strong-willed five-year-old Lydia, and her temperamental three-year-old Jordis.
Wendy and Shiloh live in the San Francisco Bay Area and are active at their church Cornerstone Fellowship in Livermore and lead a college/young adult life group at their home every week. Wendy loves Jesus and is passionate about sharing her faith and encouraging women in their faith and in the motherhood. She also loves blogging, Persian food, hot chocolate, So You Think You Can Dance, Settlers of Catan, and family vacations.
In a moment of temporary insanity and a lot of late nights Wendy decided to write a book of humor and encouragement for fellow moms and moms-to-be called Totally Desperate Mom: Keepin’ it Real in the Motherhood.
Right now the Plum District has a deal going on Wendy's book! Be sure to head over and get yourself this funny, engaging, uplifting read (and help a local women's shelter in the meantime). Check it out.
********

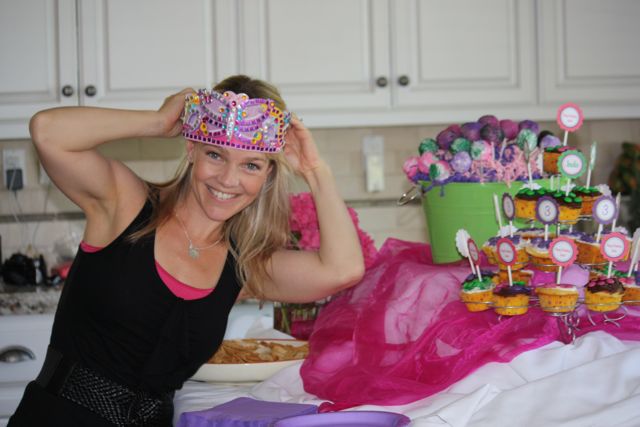
For Jordis's third birthday party I decided to make cupcakes and cake pops. Because I wanted to eat one or twenty. So I browsed recipes and got some tips from my Tweeps.
Here is the best of what I learned about cake poppin'.
But just know that to make picture-perfect cake pops like the ones you might see on a crazy baker web site or over at Crazy Crafty Christina's blog you will need a strong Type-A personality, special tools, the perfect dipping chocolate, and a fancy camera. I have none of those items, but I did borrow my sister-in-law's nice camera for the party.
So my recipe, if you will, is for . . .
Realistic Cake Pops
Good-Enough Cake Pops
Not-Necessarily-Perfectly-Round-or-Smooth Cake Pops
Most-Likely-To-Not-Be-Featured-on-Bakerella.com Cake Pops
Cake Pops for the Craftily Challenged
Here you go:
1. Make and bake a cake. Preferably not in an Easy-Bake Oven. Let your kids stir up the mix a bit cuz they will remember it fondly when they grow up.

2. Let it cool.
3. Take the cake out of the pan, bash it up, and put it in a large mixing bowl, not a fish bowl.
I did one batch of chocolate cake and vanilla frosting and one batch of yellow cake with chocolate frosting. Both of them were delicious and overly consumed by moi.
4. Add at least 1/2 of the tub of artery clogging, artificial everything frosting to the bashed up cake.
Special Tip #1 - Probably best to add a little more than 1/2 the tub of frosting. It makes for some good glue to hold the ball together and if you don't put enough in, they get a little cracky.
5. Mix the cake and frosting with a fork until you are bored. Then use your hands until it is thoroughly mixed and begging to be shaped into balls.
6. Roll that mixture into balls with your hands.

Let your kids help you with this, but don't expect the balls to be perfectly bally. But who cares? It's for a three-year-old's birthday party, not a magazine cover. Unless it's for a magazine cover - in that case just go buy the cake pops. Make the balls not too big, not too small. Maybe about the size of a walnut. Unless walnuts greatly vary in size (do they?). If that's the case, I don't know what to tell you.

7. Put the balls on a cookie/baking sheet lined with wax or parchment paper and put in your refrigerator for at least an hour.
Some internet peeps said to freeze, others said that freezing them was lame. Don't leave the balls in there for more than 24 hours or they begin to dry out.
8. Get some melting chocolates and put them on the stove in a non-stick pot to melt.
Special Tip #2: Don't use a stainless steel pot like I did with my first batch of purple melting junk. Because well, it just doesn't work and I had to toss it.
9. Dip the tip of fancy sticks you bought from a craft store or ones you collected from the tootsie pops your kids just ate, into the melted chocolate and then stick it about half way into the ball.
10. Stick all the balls (now with sticks in them) back in the fridge so that chocolate, (which acts like glue, but won't get you high), will harden.


10. After a few minutes, take out one pop at a time and begin the arduous dipping process. And by dipping I mean DON'T DIP!
Use a spoon to drip the chocolate onto the ball. Get it all over that bad boy. I am sure the unrealistic cake pop recipes have a fancy way of doing this so the chocolate goes on perfectly smooth. But I am sure that is more time consuming and stressful so just get the surface of the ball covered and move on with your life.
11. After the ball is unevenly lathered with the melting chocolate then shake on your sprinkles, chocolate chips, shards of glass, or whatever else you think would make a great topping for your pops.
12. Stick the pops in a flat piece of styrofoam.
We always throw away styrofoam when it comes in packaging because our cats eat it and then puke it up. (Who says styrofoam is not recyclable? Tell that to my cats.) Therefore, I had to buy a piece of styrofoam at the craft store . . . perhaps the most painful part of my cake-pop journey.

I made a cake-pop bouquet with some of the cake pops (on an $8 styrofoam ball!) and covered others with treat bags and ribbon as party favors.

Special Tip #3 If you make your balls too big or they won't fit into the treat bags and you will have to eat them right there on the spot.

The birthday girl loved the cake pops = success!

The birthday girl's mom loved the cake pops = cake pop booty.
The cake pops were time consuming to make, but if you follow my special tips and don't expect perfection then they are not difficult to make. My goal is to never to make them again simply because they tasted incredible and I ate too many and I don't want to get fat and have health issues.
*********
The giveaway is STILL going strong, through July 9th! Enter to win: 1) two grain-free cookbooks for all your birthday (and everyday) baking needs; 2) a birthday party giveaway to Mel's shop including an invite design, 25 invites w/envelopes, 25 cupcake toppers and 25 favor tags or stickers. Two lucky winners!
Leave a comment on this post in order to be considered. Answer me this: when it comes to crafty, where do you fall on a scale of "realistic" to Martha? (Me, I like to pretend I'm a Martha but when it comes down to it, I'm too lazy to always follow through. Probably halfway between the two.)


1 comment:
Love this!!! I love Wendy! Now I know what I'm making for the next neighborhood potluck!
Post a Comment